

Starting a New Garden
10 December, 2019
4 min read
1. When you shop for bedding plants, look for compact, bright green, healthy plants. The label will tell you about the variety, color, and height. Don't reject those that aren't in bloom; all-green plants often do better in the long run.
2. If you can't plant right away, keep your new flowers moist. Remove the plants from the pack by holding them with one hand while inverting the pack. If they don't fall out easily, tap the bottom with a trowel.
3. If the plants are not in individual cells, separate them gently by hand or with a knife just before planting; don't allow roots to dry out. Soil in the planting bed should be tilled, enriched, and watered before planting.
4. If roots seem compacted, loosen them gently before planting. Dig a hole slightly larger than the root ball, and set the plant in place at the same level it grew before. Firm soil around the roots.
5. Water well right after planting. Water frequently until plants become established and new growth has started. Once that happens, plants fill in quickly.
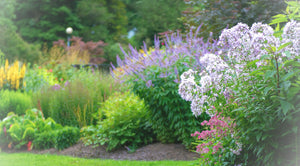
The Planting Site
Most new garden areas will require site preparation before planting can begin.
Raking
With a bamboo rake, gather together leaves and trash left from the fall and winter. Raking is easy, but it needs to be done carefully to be done right; you may need to practice a bit first. Save the leaves and other organic debris for your compost heap!
Removing the competition
Weeding can be boring, but if you have a big-weed contest, and hang up the biggest, most unusual, and longest weeds in the hallway display, you'll have fun challenging yourselves and the work will get done a lot faster.
Small weeds can be pulled by hand, but removal of grass (sod) and large weeds will need tools, such as a gardening spade. Be sure the weeds come up with their roots intact. Add the weeds and grass to your compost heap, provided they haven't been treated with a weed killer.
If there are any shoots from trees, sprouts from seeds or seedlings growing, remove them. Pulling or digging up unwanted existing plants, rather than tilling them under, will help ensure they won’t return. If you start working the area in early spring, before any existing plants have had a chance to take hold, this will also help ensure that no competing plants will disturb your bed.
Removing the sod
If your spot involves a grassy area, start by removing two to three inches of sod, either manually with a shovel or sod cutter. The latter of the two recommendations would be easiest. If you haven’t already asked a nursery or landscape contractor for assistance, this would be the step to ask for help. It is possible they would come and cut, roll up and remove the sod for you.
Tilling
Now that the surface of the garden is clear, it's time to turn the soil. This is hard work, particularly with a new patch of ground. The best way to turn the soil is with a power-driven tiller, although small gardens can be turned by hand with a spade.
Double-digging: an alternative to tilling
To use this technique, start at one end of your garden plot. Be sure the soil is moist enough the shovel can go into it. Try this a week ahead of time and add water daily until the soil is pliable.
Dig a trench across the width of the bed standing on a board to prevent compaction. The trench should be about one foot deep and one foot wide. (If you have to make a smaller trench because the soil is too hard, that's OK.)
The soil from the first row can be put in buckets or a wheel barrow to be used in the last trench or for the compost pile.
Place a garden fork (stronger than a pitch fork) at right angle to the trench and try to pierce the soil as deep as you can. While one foot is on the shoulder of the fork, wiggle the pitch fork back and forth to loosen and fluff up the soil.
Dig another trench, but put the soil in the first trench this time. Continue until your entire bed has been completed - dig with shovel, and loosen with fork.
Use soil in buckets/wheelbarrow to fill in last trench. Even out the bed by raking it.
Add minerals (kelp, sea bird guano) or winter-spring vegetation seeds (vetch, rye) by following the package directions. If not planting vegetation right away, collect leaves to cover the garden and prevent erosion. If you are planting spring flowers, be sure it is after the last frost.
After the soil is dug, prepared and mixed, it should be leveled out with a steel garden rake. Pathways and areas that wouldn't be used for plantings should be covered with mulch.
Any rocks that are removed from this area can be used for small rock walls, a "rock" garden, or as garden accents here and there. The entire area needs to be watered thoroughly to help the soil settle.
The Planting Hole
Dig shallow planting holes two to three times as wide as the root ball. Wide, shallow holes encourage horizontal root growth that trees and shrubs naturally produce.
In well-drained soil, dig holes as deep as the root ball. In poorly-drained heavy clay soil, dig holes one to two inches shallower than the root ball. Cover the exposed root ball top with mulch.
Don't dig holes deeper than root balls or put loose soil beneath roots because loose soil will compact over time, leaving trees and shrubs planted too deep. Widen holes near the soil surface where most root growth occurs. Score walls of machine-dug (auger, backhoe) holes to prevent glazing.
Backfill holes with existing unamended soil. Do not incorporate organic matter such as peatmoss into backfill for individual planting holes. Differences in soil pore sizes will be created causing problems with water movement and root growth between the root ball, planting hole, and surrounding soil.
Backfill half the soil, then water thoroughly to settle out air pockets. Finish backfilling, then water again. Cover any exposed root ball tops with mulch.
Incorporate slow-release granular fertilizers into backfill soil to provide nitrogen, or if a soil test indicates a need for phosphorus or potassium. Avoid using fast-release agronomic fertilizers that can dehydrate tree roots. Use no more than 1# actual nitrogen per 1,000 ft. of planting hole surface. (Example - if using 18-6-12 with a 5' diameter hole, incorporate 0.3 oz. per planting hole.)
2. If you can't plant right away, keep your new flowers moist. Remove the plants from the pack by holding them with one hand while inverting the pack. If they don't fall out easily, tap the bottom with a trowel.
3. If the plants are not in individual cells, separate them gently by hand or with a knife just before planting; don't allow roots to dry out. Soil in the planting bed should be tilled, enriched, and watered before planting.
4. If roots seem compacted, loosen them gently before planting. Dig a hole slightly larger than the root ball, and set the plant in place at the same level it grew before. Firm soil around the roots.
5. Water well right after planting. Water frequently until plants become established and new growth has started. Once that happens, plants fill in quickly.
The Planting Site
Most new garden areas will require site preparation before planting can begin.
Raking
With a bamboo rake, gather together leaves and trash left from the fall and winter. Raking is easy, but it needs to be done carefully to be done right; you may need to practice a bit first. Save the leaves and other organic debris for your compost heap!
Removing the competition
Weeding can be boring, but if you have a big-weed contest, and hang up the biggest, most unusual, and longest weeds in the hallway display, you'll have fun challenging yourselves and the work will get done a lot faster.
Small weeds can be pulled by hand, but removal of grass (sod) and large weeds will need tools, such as a gardening spade. Be sure the weeds come up with their roots intact. Add the weeds and grass to your compost heap, provided they haven't been treated with a weed killer.
If there are any shoots from trees, sprouts from seeds or seedlings growing, remove them. Pulling or digging up unwanted existing plants, rather than tilling them under, will help ensure they won’t return. If you start working the area in early spring, before any existing plants have had a chance to take hold, this will also help ensure that no competing plants will disturb your bed.
Removing the sod
If your spot involves a grassy area, start by removing two to three inches of sod, either manually with a shovel or sod cutter. The latter of the two recommendations would be easiest. If you haven’t already asked a nursery or landscape contractor for assistance, this would be the step to ask for help. It is possible they would come and cut, roll up and remove the sod for you.
Tilling
Now that the surface of the garden is clear, it's time to turn the soil. This is hard work, particularly with a new patch of ground. The best way to turn the soil is with a power-driven tiller, although small gardens can be turned by hand with a spade.
Double-digging: an alternative to tilling
To use this technique, start at one end of your garden plot. Be sure the soil is moist enough the shovel can go into it. Try this a week ahead of time and add water daily until the soil is pliable.
Dig a trench across the width of the bed standing on a board to prevent compaction. The trench should be about one foot deep and one foot wide. (If you have to make a smaller trench because the soil is too hard, that's OK.)
The soil from the first row can be put in buckets or a wheel barrow to be used in the last trench or for the compost pile.
Place a garden fork (stronger than a pitch fork) at right angle to the trench and try to pierce the soil as deep as you can. While one foot is on the shoulder of the fork, wiggle the pitch fork back and forth to loosen and fluff up the soil.
Dig another trench, but put the soil in the first trench this time. Continue until your entire bed has been completed - dig with shovel, and loosen with fork.
Use soil in buckets/wheelbarrow to fill in last trench. Even out the bed by raking it.
Add minerals (kelp, sea bird guano) or winter-spring vegetation seeds (vetch, rye) by following the package directions. If not planting vegetation right away, collect leaves to cover the garden and prevent erosion. If you are planting spring flowers, be sure it is after the last frost.
After the soil is dug, prepared and mixed, it should be leveled out with a steel garden rake. Pathways and areas that wouldn't be used for plantings should be covered with mulch.
Any rocks that are removed from this area can be used for small rock walls, a "rock" garden, or as garden accents here and there. The entire area needs to be watered thoroughly to help the soil settle.
The Planting Hole
Dig shallow planting holes two to three times as wide as the root ball. Wide, shallow holes encourage horizontal root growth that trees and shrubs naturally produce.
In well-drained soil, dig holes as deep as the root ball. In poorly-drained heavy clay soil, dig holes one to two inches shallower than the root ball. Cover the exposed root ball top with mulch.
Don't dig holes deeper than root balls or put loose soil beneath roots because loose soil will compact over time, leaving trees and shrubs planted too deep. Widen holes near the soil surface where most root growth occurs. Score walls of machine-dug (auger, backhoe) holes to prevent glazing.
Backfill holes with existing unamended soil. Do not incorporate organic matter such as peatmoss into backfill for individual planting holes. Differences in soil pore sizes will be created causing problems with water movement and root growth between the root ball, planting hole, and surrounding soil.
Backfill half the soil, then water thoroughly to settle out air pockets. Finish backfilling, then water again. Cover any exposed root ball tops with mulch.
Incorporate slow-release granular fertilizers into backfill soil to provide nitrogen, or if a soil test indicates a need for phosphorus or potassium. Avoid using fast-release agronomic fertilizers that can dehydrate tree roots. Use no more than 1# actual nitrogen per 1,000 ft. of planting hole surface. (Example - if using 18-6-12 with a 5' diameter hole, incorporate 0.3 oz. per planting hole.)